3. Let's try origami

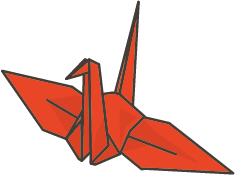
The "origami crane" is one of the most representative origami creations, in which a square piece of paper is folded into the shape of a crane.
Because the folding method is simple, it is known to many generations, and instructions for making it can be found in origami books for beginners.
Since origami cranes are decorated on kozuka (small swords) (*2) made by Goto Eijo (1577-1617), a swordsmith (*1), it is believed that origami cranes were widespread among the general public at least by the beginning of the 17th century.
*1 Sword fittings craftsman: a craftsman who creates the fittings of swords, such as the tsuba (guard), menuki (sword guard), kozuka (small blade), and kogai (hairpin). *2 Kozuka: the part of the Japanese sword that corresponds to the handle.

CAT EYE original origami set as a gift
With every product purchased, we will give you an original CAT EYE origami set.
Try folding your favorite design using seven different types of origami paper.
The smaller the size, the more difficult it becomes.
Please try the yellow color.
Black 14x14cm
Sky blue 12x12cm
Orange 10x10cm
Blue 8x8cm
Purple 6x6cm
Red 4x4cm
Yellow 2x2cm
3. Let's try origami - Part 1: Folding cranes
In this first installment, we will look at one of the most popular pieces, the origami crane.
If you are folding for the first time or haven't folded in a while, we recommend starting with large origami paper (about 15cm) as it is much easier to fold.
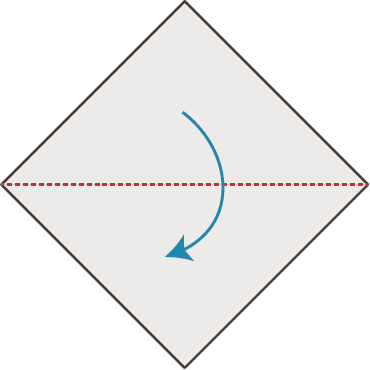
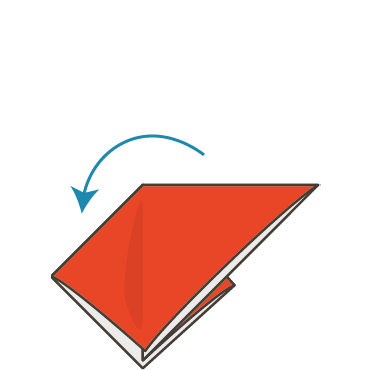
1. Turn it over and crease the dotted lines to make a triangle.
2. Make creases as shown in the picture.
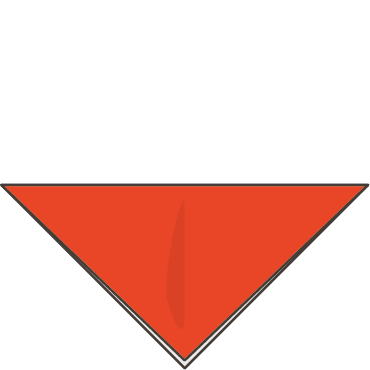
3. Fold it again to make a triangle.
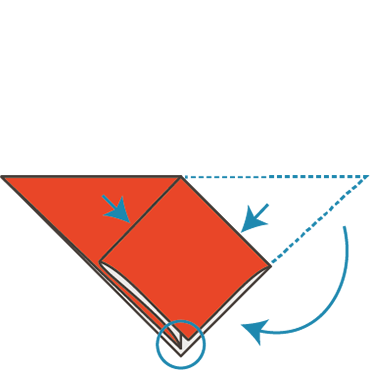
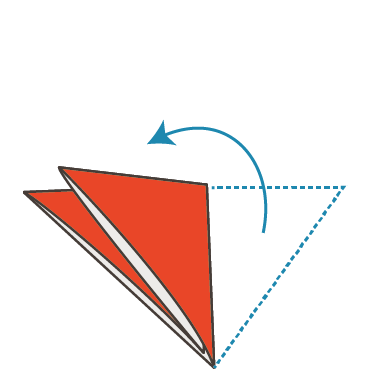
4. Lift one side and open it, line up the top and bottom parts as shown in the ⚪︎ mark, and crease the → part.
5. Turn it over and repeat step 4.
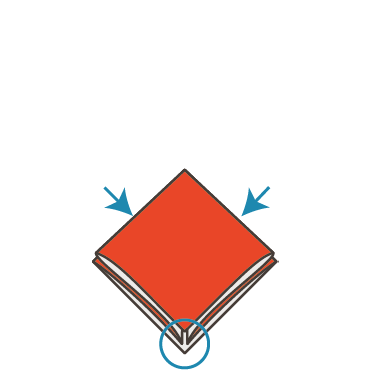
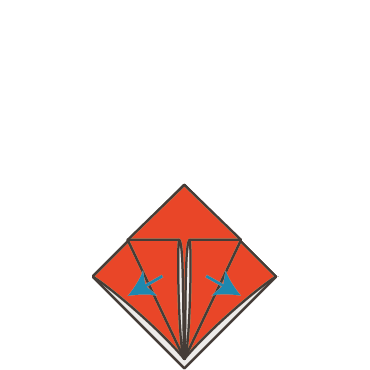
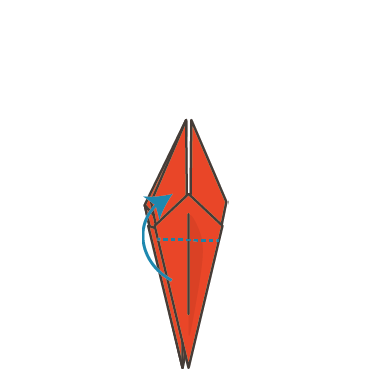
6. The inside part tends to slip out of place, so press down the part marked with a ⚪ with your fingers and fold the part indicated by the arrow.
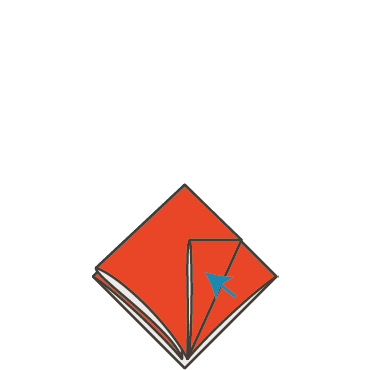
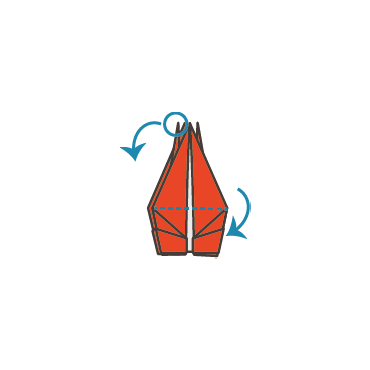
7. Fold both sides to the center line and make creases.
8. As shown in the picture, fold it firmly along the center line, then return it to its original position.

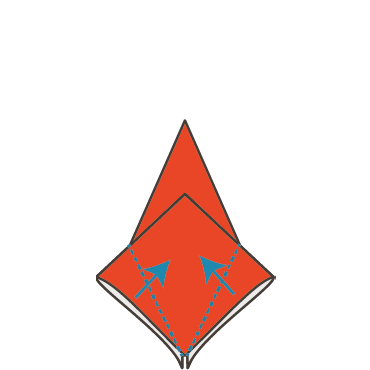
9. Hold the top part and open it as shown in the picture.

10. Place a crease along the center and fold it as shown in the picture.
11. Turn it over and align it along the dotted line to the center.

12. Once you have created the creases, return it to its original position.

13. As with 9, hold the top part and open it as shown in the figure.
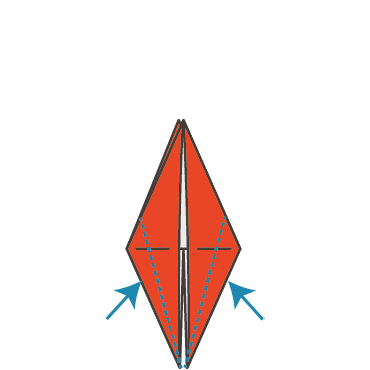
14. Move both sides in the direction of the arrows to make creases, but leave a small gap in the center.
15. Fold both sides in the same way. Next, open it from the side in the direction of the arrow.
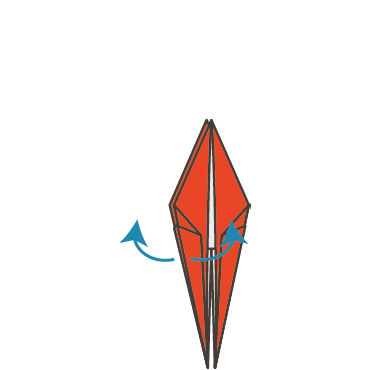
16. Move the bottom part in the direction of the arrow so that it fits perfectly with the top tip. Do the same on the other side.

17. Open the side in the same way as in 15. Open the other side in the same way.
18. Take the dotted part and make the feathers, then weave the part marked with a ⚪︎ inward to make the beak.